Install apache tomcat on raspberry pi
What you will learn here about apache tomcat on raspberry pi:
- How to install apache tomcat on raspberry pi or How to install Application server on raspberry pi.
- How to change apache tomcat port on raspberry pi
How to install Apache tomcat on raspberry pi
Please follow the following steps to install apache tomcat on raspberry pi.
1)First open the raspberry pi terminal.
2)Execute the following command to update existing packages.
3)In order to install apache tomcat on raspberry, you need a JDK. So please execute the following command to install JDK on raspberry pi.
4)Now execute the following command to make tomcat folder.
6)Execute the following command to download apache tomcat.
IMPORTANT NOTE: You will get an error 404 not found when apache-tomcat-8.5.47.zip file is not available in above path. If you are getting 404 not found error then only follow this step. Right now available apache-tomcat-8.5.47 version is available in step 8 path. In future apache tomcat version may change. To know available apache tomcat version please open the following URL in any browser and follow following steps show image.
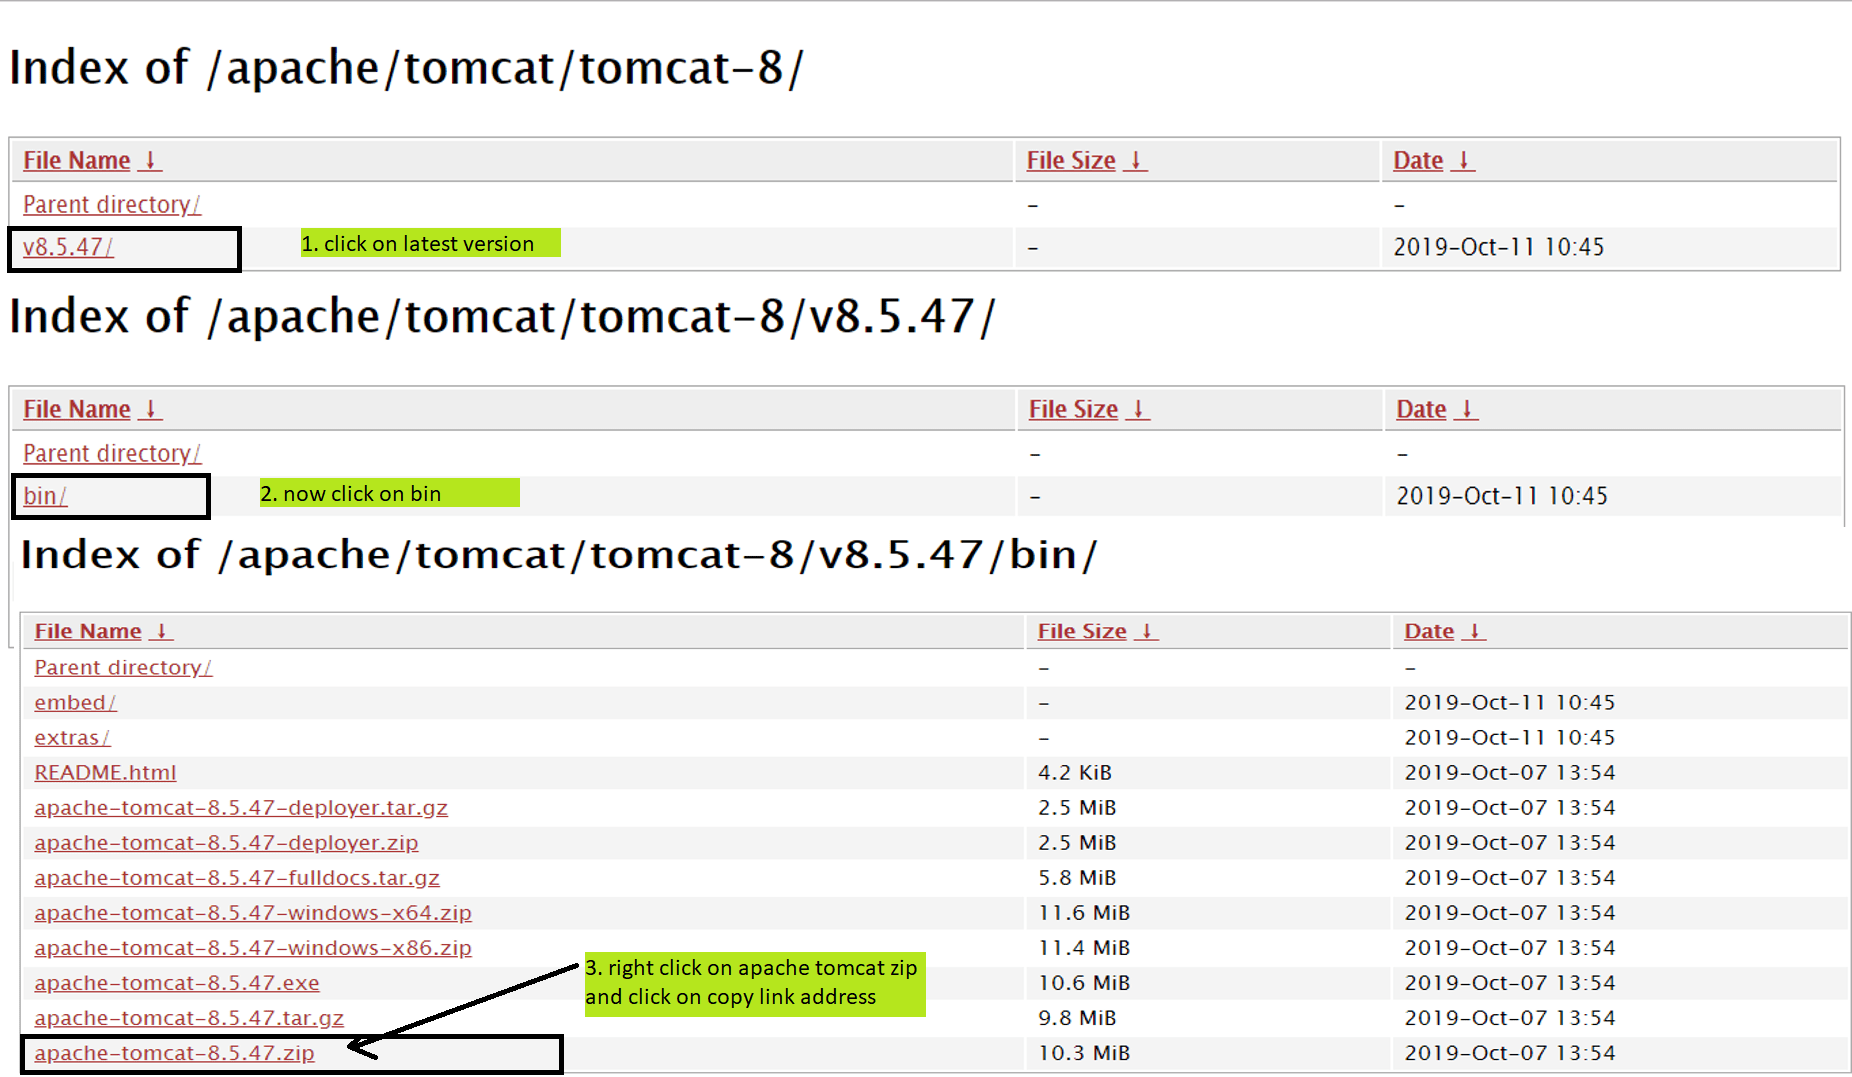
If there is new version then replace copied path and execute the following command.
IMPORTANT NOTE: If there is new version available then please replace version name below in every step.
7)Downloaded apache tomcat is available in zip format. So to unzip it. First, we need to install unzip on raspberry pi. To install unzip on raspberry please execute the following command.
8)Execute the following command to unzip apache tomcat.
9)Now execute the following command to navigate in the bin folder of apache tomcat.
10)Execute the follwoing command to make all .sh files as executeble.
11)Execute the following command to start apache tomcat
12)Execute the following command to stop apache tomcat
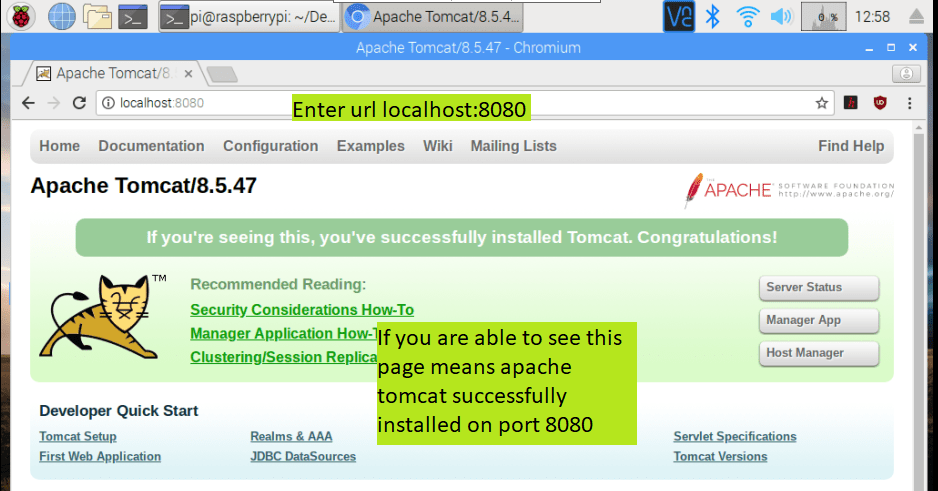
13)Now please open any browser on Raspberry pi.
14)Enter the following URL in browser and if you are able to see apache tomcat default page means apache tomcat is successfully installed on raspberry pi.
How to Change apache port on raspberry pi
Please follow the following steps to modify the apache tomcat port on raspberry pi. Below we will see how to install apache tomcat on port 80 on raspberry pi.
1)Please open the raspberry pi terminal
2)Please navigate to conf folder of apache-tomcat-8.5.47
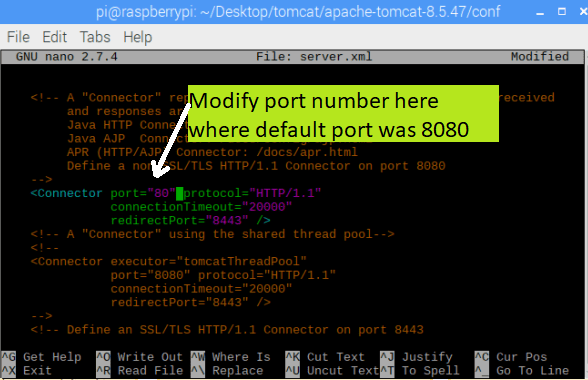
3)Now execute the following command to edit server.xml file on raspberry pi
4)modify the connector port to 80 which is shown below
5)Now press the Ctrl+ X and please press y and hit enter to save the changes.
6)Now execute the following command to go in bin folder of apache tomcat.
cd bin
7)Now please execute the following command to stop the apache tomcat.
8)Now please execute the following command to start the apache tomcat.
9)Now please open any browser on raspberry pi
10)Enter the following URL in browser and if you are able to see apache tomcat default page means apache tomcat is successfully installed on raspberry pi.


